How to enable ray tracing in Minecraft for better graphics
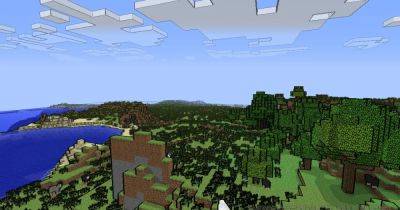
Minecraft is known for many qualities, but graphics are not typically among them. The incredibly flexible and dynamic building game chose a more simple yet pleasing art style to better serve its mechanics. That being said, while that blocky aesthetic will never go out of style, there are plenty of ways to improve the looks since it originally came out in 2011. Aside from graphics packs and shaders, the most impressive visual update you can add to Minecraft is ray tracing.
Difficulty
ModerateDuration
30 minutesWhat You Need
PC that can run ray tracing
Xbox Series X/S
Ray tracing-compatible resource pack
Ray tracing is one of the latest and most impressive graphical improvements video games have seen in the last few years. This system focuses on making light sources behave more realistically, which alone can make a game look years newer than it really is. Everything from shadows and reflections to world lighting just feel more real. However, it isn't something that's on by default. Whether you're playing on PC or the Xbox Series X/S, here's how you can try out ray tracing in Minecraft for yourself.
How to turn on ray tracing on PC
PC is the most popular Minecraft platform and where ray tracing is most common in games since it is generally too taxing for consoles to handle. Here's how to turn it on.
Step 1: Load up your copy of Minecraft Bedrock Edition.
Step 2: If you don't have a ray tracing-enabled texture pack, open the Marketplace.
Related- How to climb the Battlements in Hogwarts Legacy
- How to get the Thunderbolt of Zeus in Fortnite
- How to refund Fortnite skins, cars, and other store items
Step 3: Use the search function and type in «ray tracing.»
Step 4: Download a ray tracing-enabled pack.
Step 5: Wait for the download to complete.
Step 6: Create a world using this pack.
Step 7: Return to the main menu.
Step 8: Go into Settings.
Step 9: Select Video.
Step 10: Scroll down and toggle on the Ray tracing slider.
Step 11: Load back into your world and